
It would be better for a self build if the screen had its own battery power source and the touch panel had it’s own USB connector for the computer device. This does not hold true for all 5” HDMI Screens
PC stick and HDMI monitor being powered by two mobile battery packs.
3
Power

Currently I need to get the HDMI 5” to be safely used and carried for a portable device.
An improvised made up case showing a proposed internal battery power for HDMI screen.
The screen and it’s internal power would create a portable 5” display for any HDMI output devices.
Devices using the screen will need their own power. The
The Battery shown in the picture (power 5) powering the screen above right is sized 55mm X 50mm x 5mm. It is rated at 2000mAh. It was disassembled along with its controller for USB output and charging from the round case shown right.
The rechargeable battery back left bottom (power 6) is 1200mAh 5v 1.0A output. It was bought in a British £ shop. A test showed it would power the 5” screen for 1½ hours. They are however square in cross section and its height making it bulky for a slim handheld use.
Keeping the micro USB socket open for optional powering from either an internal or external battery would be useful. The cheep £ shop battery could be carried for backup.
Picture right 4: A cheep £ shop battery dismantled showing the battery cell and controller USB sockets for charging and power output.

Site Under Development
Note: This site is a personnel on going blog for creating a Windows 10 handheld PDA from a PC stick and a five inch HDMI screen. It’s construct is that of using the web space to assemble items,ideas, a record of the development and issues for creating the device as and when. It is not intended for public viewing but its link will be shared by the author with others for help and advice to and from other interested parties. The site will not be in a refined state.
Replacing The HTC P6500 Windows Mobile (PDA) Hand Held Computer.
The HTC P6500 hand held (Phone) Computer I own is out of production it’s applications are dated in what they can do but for me it is not obsolete. For it’s small 3.5 inch touch screen it uses a stylus which means imputing text with a on screen keyboard, and screen cursor movements can be used with precision. Modern devices such as the Android operating system use capacitive touch for finger use. If someone can input data using their finger into a spread sheet on a capacitive finger touch Phone for any length time they are working very hard. Using a stylus for a pointer is more comfortable and quicker.
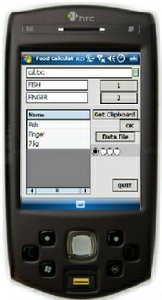
The HTC P6500 Computer and other Windows Mobile 6.1 Handheld PDAs.
Handheld computer devices which use a stylus are not being made by established producers any more. The only current stylus touch (resistive Touch ) for small portable sized screens currently being made are targeted to the Raspberry PI. Can using maker boards such as the Raspberry PI or a Windows Stick PC be used to create a portable pocket handheld PDA? And! As I need it to replicate at least what I do currently with the HTC Mantle?
Small five inch HDMI screens can be bought for a self build hand held PDA devices
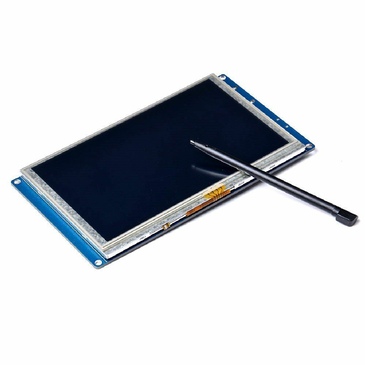
Without using the integrated touch panel the screens can be used simply as a HDMI monitor.
Looking at the devices and pieces that could be used with the screen.
What I have already.
Raspberry PI 2 (not used or mentioned on site)
Raspberry PI Zero W (tested with a 5 inch HDMI screen AR1100 controller)
Kiano Slim Stick PC (using a PC stick
The HDMI screens I have.
5 inch HDMI screen with resistive touch overlay with no calibration software. Updated, the original touch panel has been removed and a new resistive touch has been added to a USB PenMount Controller. See Here
5 inch HDMI screen with resistive touch overlay using AR1100 controller with calibration software which with Windows works as a mouse. No switching between Landscape and portrait modes. This screen was bought for the Raspberry Pi
Of all the options provided by the above equipment a Windows Stick PC with a 5” HDMI screen has shown the most positive for further development
Issues with providing power for the Slim Stick Windows 10 PC and 5 inch screens.
Testing with a
Adafruit 5” HDMI screen with a built in AR1100 Controller
5 inch HDMI screen bought from Adafruit with a built in AR1100 controller for a resistive touch. I bought this for the Raspberry PI.
For the power tests below for use with the Slim Stick PC I used a bluetooth mouse. The resistive touch screen was not used at the time.
Note Later test with AR1100 controller emulated a single button mouse under the stylus. No long press for right click.
Powering from a wall plug adapter works as expected
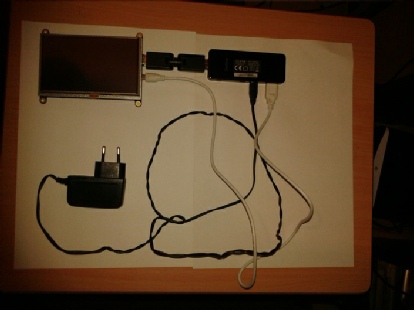
With using battery pack power the stick PC seems to find it difficult to power the screen from it’s USB link. It all works well if a separate battery pack is used for the screen.
If data for screen touch pointing devices is shared with the power of a USB link from the stick PC a powered hub will be needed. The set up below worked for me but the USB powered hub used although small is still bulky for a hand held device.
2
Power


Page Under Development
This Page is in on going development. It sketches out the hardware build options of a 5 inch HDMI screen with a resistive touch overlay panel for a handheld Windows PC stick.

The Slim Stick computer could be wired to a battery pack kept in a pocket and still meet it’s handheld criteria.
Using a Stylus
Using a stylus on a touch screen for mouse cursor movement will enable holding the device with one hand and desk top control and on screen keyboard input made with the other. Additional external keyboards or mice should not be needed.
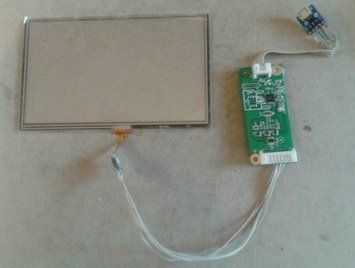
Hardware for resistive touch will be needed.
The 5” screen used with this test was bought cheap on Ebay. It was sold with a resistive touch panel built in and marketed as “already calibrated no drivers needed”. The calibration was terrible. The original touch panel was removed and replaced by another which I connected to a USB PenMount controller.
Unlike the 5 inch HDMI screen bought from Adafruit with a built in AR1100 controller this cheep screen was happily powered by 5 inch HDMI male output plug from from the Slim Stick PC which in turn was powered by a 5 volt 2 amp battery pack. Only an additional micro USB connection from the stick computer to the PenMount Controller was needed.
A resistive touch panel will need to overlay the screen for stylus mouse action. It will need to be connected to a USB touch controller.


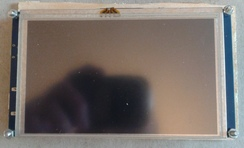
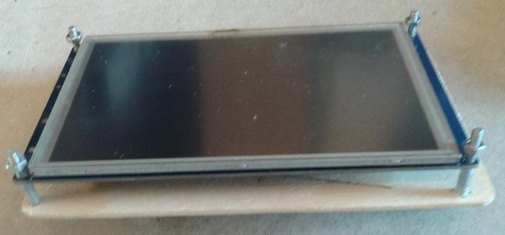

5 inch HDMI screen mounted 10 mm above a base board.
PenMount PM6300A-
5 inch HDMI screen mounted 10 mm above a base board.
Picture of the base board to be fixed below the screen showing
the proposed items
to be on the board.
This Battery proved not necessary with 5” screen used
Battery for screen power supplied to male micro USB plug
This micro USB plug was used to connect to the HDMI screen’s micro socket for additional power. Now proved to be unnecessary.

Femail micro USB socket attached to a fly out board.


The above assembly of components was used as a provisional set up to install PenMount controller drivers and test stylus touch on the screen for the Kiano Slim Stick PC .
Using the standard calibration with the PenMount set up stylus movements did most things accurately as expected. My bench mark standard was for a comparison with the stylus touch on the HTC Windows Mobile Device. Control features needed; cursor staying under the stylus tip at all screen positions, long press for right click, accurate stylus typing with an on screen keyboard.
Unlike Windows Mobile Devices the additional features needed for a Windows Desktop. The ability to move application windows around the desk top worked comfortably but the ability to size windows had awkward short comings. More Detail. Using A Stylus.
Further Hardware Details and Speculation Notes
Further Hardware Details and Speculation Notes
Issues found with the assembly and build for the provisional handheld
mock up.
The five inch touch pad I used had 4 wire flat flex tail connector had a
line out for FPC-
PenMount controller pins. Cross over wiring was needed.
http://www.buydisplay.com/default/5-
The PenMount controller board had molex connectors for USB and touch
panel. These are probably ideal for larger screen fitting but for a
handheld device they can increase the physical height needed for the
final device. De soldering and removing the connectors and fixing onto a
printed circuit board or something similar could reduce final height.
PenMount PM6300A-
Quotes And Sales
https://www.review-
A different internal battery could reduce height. The one shown in
(power 4) was 5 mm thick. Another battery from inside 7” Android tablet
was measured at 3 mm thick. A battery charge and 5 volt output
controller for such a battery on Ebay are selling at
The set up I used for a working mockup.
The only 5” HDMI screen without a touch controller already built in was advertised by Adafruit. The Adafruit screen I have at the moment has the built in AR11 touch controller. That screen is being held in reserve for the Raspberry Pi Zero W. That project is currently suspended.
The Adafruit screens were priced higher than the many HDMI screens for sale on Ebay. All of these seem to have touch screen controllers built in. The vendors don’t usually disclose the make of the controller or provide drivers or driver information for them. Often sold as already calibrated. The one I bought was not reliably calibrated for the PC. The the original touch panel was removed and a new one for the PenMount controller was added. I can’t recommend an Ebay screen to buy it is a risk that has to be taken.
Another battery, as first thought, to provide power for the Adafruit screen proved unnecessary with a second adapted cheap screen bought from Ebay.
Keeping a second internal battery for alternative options.
The PC stick computers don’t have sockets for sound or microphones so these could use USB alternatives. There are small powered USB hubs with a micro USB plug for OTG devices like Phones. They output to three USB sockets and there is a micro USB socket for power input. The circuitry of these hubs could be extracted and possible fixed onto the base board.


Faulty Micro Hub with casing removed.
Micro USB Plug
to Connect to
Computer Device
Micro USB Plug
to Connect to
Computer Device
Micro USB Power Socket
USB Sockets
The micro USB plug cable to connect to the PC Stick will need to be longer. One USB output cable could connect directly to the PenMount controller without the need for a socket connector. A USB camera could be built into the back of the case.
Navigation
Page 1 Current Development Intoduction
Hard Ware
Using A Stylus
old Development
Page
Building
New Page
Building Resistive Touch Screens
Creating a Stylus Touch Screen
Going
Headless With VNC